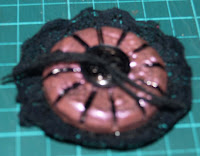
I can't tell you the mess I got into with this fiddly pass-time - my fingers just ain't the right size and shape for faffing about with lickle buttons...!
So I ended up doing a BIG button and made a BIG mess...! LOL!
Thanks to the fab tutorial though, all was not lost and I managed this....!
I do apologize for the terrible photos but I'd already altered the button before I realized my camera was on the wrong setting! It looked okay through the lens - honest...!
I started out with a big, plain black button with radiating divisions across it.
So, I then triple embossed it with an embossing pad and 'Moonglow' Stardust Candy - 'rose' embossing powder. There was embossing powder everywhere! I'm still wiping it up a week later ! LOL!
I then stamped into the last still hot layer with an inked up rubber stamp only for the ink to wipe off all over my fingers when it had cooled! I guess I should have used Staz-on or something!
Last of all I used my copic black to mark the divisions again, added another, small black button to the centre and ran a length of embroidery silk through the button-holes a couple of times before adhering the lace round the back of the rim .
And here it is finished!
I actually like it very much and have already used it on my project for last week's Crafty Cardmakers demo! I will have another go and persevere until I am an expert like Samantha!Here is my second attempt. Large green 'cup' shaped button into which I placed a few sequins and then filled with Glossy Accents (I threaded a piece of green wire through the button-holes first to create an 'anchor').
I then added to the still-wet GA some green Micro-beads and some small watch bits - cogs and the like.
When dry, I threaded the grosgrain ribbon through the dungaree-buckle and then attached the button via the wire to the buckle. I then added a vintage plastic buckle to the ribbon too.
I then added more bits and pieces and would probably still be attaching them if time allowed! LOL!
And now it's a rather steampunk brooch!
Stashbooks and StitchyBear Stamps are our sponsors this week!
Hugs
Ei
x


Cool broch - very clever indeedy! Cheers Claire x
ReplyDeletelove the brooch you have given me food for thought thanks!
ReplyDeleteWOWSERS Ei this is really funky. Sounds like it gave you a huge amount of pleasure in creating it as well.
ReplyDeleteLin xx