Tuesday 29 March 2011

Tip Top Tuesday - Nature's Inspiration/Polished Stone

 This week at Top Tip Tuesday our fab teamie, Paula has come up with a wonderful 


tutorial !  


If you've ever wondered how to get super inking effects then this is one tutorial you should have a look at. 

It'a called 'Polished Stone' and is as versatile as any effect can be, as you change and modify it to suit your project.
We also have two fab sponsors :-


Please snag either blinkie   


For my project this week, I've used the same technique as Paula has demonstrated in her wonderful and easy to follow Tutorial.


For the technique have a look at Paula's Tutorial. My materials were:
Astrolux card in yellow
Various Ranger alcohol inks including metallic
Blending alcohol Ranger


Be advised - the alcohol inks dry VERY fast on Astrolux! So work quickly!

Look forward to seeing your entries over on the blog!
Hugs
Ei
x


Monday 28 March 2011

Crafty CardMakers - Spotlight on Decoupage

This week at CraftyCardMakers Spotlight, we're putting the spotlight on crafter's favourite technique, decoupage.


As you all undoubtably know, this is the art of creating dimensional images by layering different portions of your image with either 3D foam squares or silicone glue.


Our lovely team-mate Mandy has created a very easy-to-follow tutorial so there's no excuse!


Technique Junkie, incorporating Patstamps is our sponsor this week and they're offering a fab prize to the winning entrant.


Most of us have done decoupage at one stage or another, so have a go!
Hugs
Ei
x

Tuesday 22 March 2011

Top Tip Tuesday - Show Me Those Buttons....!

Our teammate Samantha is responsible for this week's mayhem at Top Tip Tuesday! She has made a superb tutorial for altering buttons!

I can't tell you the mess I got into with this fiddly pass-time - my fingers just ain't the right size and shape for faffing about with lickle buttons...!


So I ended up doing a BIG button and made a BIG mess...! LOL!
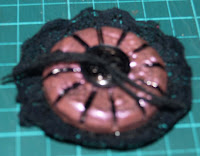
Thanks to the fab tutorial though, all was not lost and I managed this....!


I do apologize for the terrible photos but I'd already altered the button before I realized my camera was on the wrong setting! It looked okay through the lens - honest...!


I started out with a big, plain black button with radiating divisions across it. 


So, I then triple embossed it with an embossing pad and  'Moonglow' Stardust Candy - 'rose' embossing powder.  There was embossing powder everywhere! I'm still wiping it up a week later ! LOL!
I then stamped into the last still hot layer with an inked up rubber stamp only for the ink to wipe off all over my fingers when it had cooled! I guess I should have used Staz-on or something!


Last of all I used my copic black to mark the divisions again, added another, small black button to the centre and ran a length of embroidery silk through the button-holes a couple of times before adhering the lace round the back of the rim .

And here it is finished! 
 I actually like it very much and have already used it on my project for last week's Crafty Cardmakers demo!  I will have another go and persevere until I am an expert like Samantha!


Here is my second attempt.  Large green 'cup' shaped button into which I placed a few sequins and then filled with Glossy Accents (I threaded a piece of green wire through the button-holes first to create an 'anchor').


I then added to the still-wet GA some green Micro-beads and some small watch bits - cogs and the like.


When dry, I threaded the grosgrain ribbon through the dungaree-buckle and then attached the button via the wire to the buckle. I then added a vintage plastic buckle to the ribbon too.


I then added more bits and pieces and would probably still be attaching them if time allowed! LOL!


And now it's a rather steampunk brooch!


Stashbooks and StitchyBear Stamps are our sponsors this week!


Hugs
Ei
x

Monday 21 March 2011

Crafty CardMakers 42 - Special Birthdays

The wonderful Joanna Sheen is our sponsor for this week's challenge at Crafty CardMakers which, I forsee to be a humongous one as it is 'Special Birthdays' - a perennial favourite! 


Our fab teamie Melly came up with this one - I'll get you for that later Mel - and I've made mine for my super Aunt Marie who, when I said about it being a 'special' birthday this year, gave me a look and said 'at my age, child, every birthday is somewhat special...!'


Y'know, I feel a new digi character coming on! Between my crazy Mum and my autocratic Aunt, I think I have to 'find' a character for their words!


For my card I've used a DL sized card and pinched a bit of my William Morris wallpaper for the background paper.  I used a Glitter Girls panel to emboss the pearlescent green card and the blue/grey card and 'fudged' the gold mirri beneath.


I then positioned the Prima blooms onto a measure of Pinflair glue gel along with the rose leaves.

Before I give it to her I will make a matching box for it as an envelope won't do for this 'special' lady!

Hope you like it!
Hugs
Ei
x

Tuesday 15 March 2011

Bonneville......

It's my brother Alan's birthday today and so I was once again, totally stuck what to make for him.
Fellas don't really 'get' cards.  They humour us girls (in general - there are a few who like them!) and say things like 'very nice' - you almost expect a pat on the head....!


Then my mind wandered (...it does that..!) off down memory lane and I remembered Alan when he was a lad, in his prime and as cool as Steve McQueen....(...he's more like the Queen these days...! LOL!)..on his motorbike!   


I could have gone the whole nine yards and drawn him a Norton Dominator, which is what he had, but I had made a perfectly good (and unused) drawing of a Triumph Bonneville (...the bike I would have liked...!) a while ago which was resting in a folder on my hard-drive, soooo.......


...here it is!
There's a verse inside too...


Remember many years ago
When you were just a lad?
You remember David, Bri & Me
Judy, Mum & Dad?


Dad’s pale blue Lambretta, 
Mum’s yellow Mini-car?
Your Norton Dominator 
Bri’s Beezer (...didn't go far..!)


I only had a push-bike 
And soon grew out of that
I always wanted a Bonnie
Even I’d be cool on that!


It never ever happened,
I had four kids instead
So here’s my Triumph Bonneville
It’s yours now Al…. 
‘Nuff said!


Happy Birthday Bruv!


The papers and Bonneville digistamp are all my Eiglas own!
Hugs
Ei
x

Monday 14 March 2011

Crafty CardMakers 41.5 - Spot - Own Designer Papers

Okay, I admit, I got a bit carried away but what the heck! In for a penny and all that...! LOL!
Hmmm..... Make my own DP.....   How about fifteen dp's.....? Well, more actually - I've pared it down! LOL!

I mean, what a fabulous challenge! Don't you think...?  Our teammate at Crafty CardMakers, Josephine, really came up with a good one here I think! And we also have a fab sponsor too!
The Stamping Boutique Have lots of nice digis for you to browse through and will be offering a fab prize to our winner!

So here's my card!


The four papers are my own Eiglas designs from my 'Roseheart' kit.
Flowers are 'Wild Orchid', leaves are Sizzix, the metal corner is Tim Holtz and the making of my altered button will be featured on my blog soon. I've not made a greeting for it but think someone might like it for their Mum....?

I've been so inspired by this challenge, I actually really did make a whole collection and, spurred on by peeps who should know better, am in dialogue regarding having them printed in 12 x 12 Scrap-pad format - I am so excited by this! 

Please feel free to let me know what you think of them - it would help me if you could leave a bit of constructive criticism - warts and all!

I might even have some of the papers as candy, if it all goes well.

Hope you like it and them!
hugs
Ei
x
****I've now had my printed sample pads back from the printer and I'm really pleased with how they've turned out!*****

Saturday 12 March 2011

I'm really excited......! Would YOU be...?

....this is my latest Eiglas Papercrafting Kit (available on my 'Eiglassing' site).

'Okay,'  you say, 'what's so exciting about that? You're always making these.'

'Ahh but, ahh but.....' says I 'they've never been in a paper pad before, have 
they?!'

And they haven't! So that's why I'm excited - they work even  blown up to 12 x 12!

I make all of my images from scratch or from a photograph or image that I myself have created. They are not derivative of any other artist, except in the normal 'loose' way of osmosis and nothing under the sky being new and I'm very proud of that.


So, that's it!


There are fifteen sheets of good quality medium/heavyweight paper (180gsm - equivalent of really famous pads in my possession) in one of each of the designs on the front page here.


What I would appreciate it very very much (as this is a first for me) if my wonderful followers would leave a comment as to what they think of a) the designs and b) a price in the region of £15.00 per pad of 15 sheets.


Now, I never ask for something for nothing so, as a reward for helping me, the comment I find most helpful will receive either a selection of sheets from the pad (UK only) or a selection of digital files from the collection (the rest of the world).
Please state if you're a Cardmaker or a Scrapper or if you are a Multi-tasker!


  This offer is open for one week and so closes Friday 18th March at midnight.
Thank you!

>>>>>>>>>>>>>>>>>>>

Another of my new kits is Eiglas Delft, one of the designs is shown here at a low resolution to inconvenience the theives. I say 'inconvenience' as there is always a dishonest smart-ass who can figure a way to get around anything an honest person can do to to protect their property.
I will say that the next time I find a purloined copy of any of my images I will name and shame the culprit !


Delft is so named as some of the sheets remind me of ceramic tiles, such as this one. Available too on 'Eiglassing' but only in digi at present.  
Please feel free to pop over to my store and browse. Costs nothing!


Hope you like these! There are a few more over at the store but only in digi for the present.  I have a bit of market research going on over at Trimcraft just now, to ascertain which of my copllections would be best to convert to paper.


Take care and speak soon!
Hugs
Ei
x


Wednesday 9 March 2011

WOYW!

I can't think why I'm compelled to allow peeps to look into the untidiest room in my house...! LOL!
Here we are again and still mayhem! Do try to WOYW though!


Playing with Tim Holtz alcohol inks.......
Gotta go - hubby's waiting for me to walk the dogs.....!
Hugs
Ei
xhttp://stamping-ground.blogspot.com/2011/03/whats-on-your-workdesk-wednesday-92.html#comments

Impressed....

....yet again, by Maddy Hill's blog.  I don't know where she finds the time (as I know she has a very busy life with calls on her time) nor yet her inspiration but it appears to be bottomless, along with her talent!


I just popped over there for my usual visit and there's a cute tale about her boyfriend Calv's 'Stamp-Guardian Rat' Rotty and Maddy's blog-mouse Calvin. 
Now it that isn't enough, there's one of Maddy's wonderful (as always!) cards with a tale too, interconnected with Rotty & Calvin!


Do pop over there - it's great fun!
Hugs
Ei
x


Tuesday 8 March 2011

Top Tip Tuesday - Making a gift Box

Our TTT team-mate Heike has created a wonderful tutorial this week for making a gift-box!
If you've never made one, thinking, 'that's too hard for me...' then think again! Heike's tutorial is so well written, even I can follow it! - and that's saying something!


Please pop over to Top Tip Tuesday homebase and have a good look at both the tutorial and the team's demos - you'll be ever so glad you did!
Hugs
Ei
x

Lickle award from a Madwoman.....

...the lovely Judie has given me this and I really do appreciate it!
Fanks Judie!
Hugs
Ei
x
x

Monday 7 March 2011

Crafty CardMakers 41 - Use fabric

I'm never at ease using sewing or fabric on cards - dunno why as it always ends up being fun - but it just is the case!
So this week I was overjoyed with our theme over at Crafty CardMakers of 'fabric'!  


Now I ain't the kind of girl to shirk - I could have just stuck a fabric flower on and that would have covered the brief - but no, I don't do 'easy', I had to do Fabric (...with a capital 'F'...!) AND piece it too! LOL!  
Never mind - I tried.....  
Guess I need to do this more often - I clearly need the practice....!


My plaid fabric ( I now see I should have done a Scottish theme) is from my Hubby Nic's shirt! He was chucking it, I liked the fabric, so I de-constructed it!


The image is my own Eiglas 'Gretchen' lolling on a floor-cushion (I cut out the card 'cushion' and pulled the fabric though, padding it with a bit of tissue) with her teddy watching the tv. I've coloured her with those markers again....what are they called..? Oh yes! Copics! LOL!


I LOVE the background paper! It's called 'Ruby Berry Flower' and no other identifying names on the bar-code but I'm pretty sure it's Making Memories.


Lickle nod to Sir Tim with the 'Imagine' ticket top left!


One Stop Cards & Crafts are our sponsors this week and they're giving the lucky winner £10.00 to spend!


To see how fabric is done PROPERLY or, indeed, to SHOW us how it's done, please pop over to CCM and take part in our challenge....or are you a scaredy cat...?


Hugs
Ei
x


Wednesday 2 March 2011

Heidi Lolling...!

Heidi is another Eiglas character based on my Ada. This time, she's a little older and she's lolling on a floor-cushion watching tv. (Heidi is available on my Eiglassing site if you like her! You may need to e-mail me as she hasn't got a 'Buy Now' button yet..!)


I have, of course, coloured her with my trusty Copics!


The lovely yellow dp is American Crafts (...I think...!) - and I've discovered, whilst looking for this, there aren't many YELLOW dp's out there!  There are oranges and limes but very few nice lemons/yellows. Of the few there are, most of them are ....well, how can I politely put this...? PANTS! LOL!


The yellow kind of chose itself because of the yellow-blonde hair, the complimentary to which is purple/lilac and as I made this card especially for the Copic Creations Challenge - Complimentary Colours.........


I haven't added a greeting as I don't yet know who I'll send her to.


I hope you (...and the team at CCC!) like her!
Hugs
Ei
x

Tuesday 1 March 2011

Another Baby Boy...!

It seems to be the season!  
Only just found out that another friend, Sue, has also had a little boy!
This is especially happy news for Sue and her family and I wish them all the very best on this most wonderful event!


Welcome to the world Nasim!


I have used for this card:-
Backing paper - DCWV
Punches - Martha Stewart
Image - 'Baby Michael' (Eiglas) coloured with Copics
The 'Baby Michael' digistamp is available on my Eiglassing site if you would like him for your own use.


I'm entering this card for :
Digital Tuesday


Hugs
Ei
x

Top Tip Tuesday - Tim Holtz FolioTutorial

It's my third month on the DT at Top Tip Tuesday and I'm really enjoying it!  


I wasn't happy yesterday. For the last week, my mojo went walkabout and I just couldn't get a handle on what to do, although I prepared about four different things but none of them seemed right, or I forgot to photograph a vital stage.


I'm very happy to report that I finally got my act together and I'm quietly chuffed about it; partly because it was so hard won, but seems to have come together finally and partly because it's actually going to be a useful bit of kit for me to use!


  It's always a bit of a bugbear with me on the DT's that I make all this stuff which no-one in my family or friends will give house-room to, so I have boxes filled with creations I like too much to chuck away/give to peeps who don't really appreciate it, but storage space is becoming a bit of a problem!


So, it's fab when I can create something that someone (...me in this instance...!) can use!


My Tim Holtz Techniques Folio


Materials needed.


4 x A5 Tim Holtz Grungeboard or plain grey cardboard (...I used the back board from an old cheap sketchpad) 
Tim Holtz 'Gears and Cogs' die cuts in same material
Tim Holtz 'Bookplate' die-cut in gold pearl card
Tim Holtz (or other distress inkpads) Ink/inkpads in various colours to suit including Peeled Paint, Mahogany,  Vintage Photo and/or Walnut Stain.
Tim Holtz Distress clear embossing inkpad.
'Swirl' rubber stamp.
Inkpad Staz-On Black
Clear embossing powder.
Spritz spray
Distress Embossing Powder in Tea-Dye and/or Vintage Photo.
Ranger Metallic inks.( Adirondak Metallic Mixture or Posh Rainbow Metallics)
Heatproof workmat.
Preferred hardware findings, Tim Holtz or otherwise.


Method


Taking one of the A5 cards, spritz generously with water then  ink up with various inks and inkpads until you're happy with it.  Don't heat-set it.


Ink up with clear embossing inkpad and layer of clear embossing powder, leaving some sparsely covered areas, and heat with heat-gun..
The water vapour from the card will cause bubbles and irregularities in the glaze. Heat until there's an uneven pitted grainy finish. You don't want it too perfect.


When cool, you can distress this further with nail-file , pokey-tool etc if you want.


By this stage, your card should feel like leather, pliable and bendy. Now ink over the whole surface with Walnut Stain or Vintage Photo (...or indeed, anything you like..!) , rubbing it well into crevices and wipe off. The ink will sink into the bare areas and wipe off the glazed areas.  Cut the perimeter with deckle-edge scissors (..or tear to make an uneven edge...). I cut the perimeter then tore a corner off.


Ink up the edges if liked.


Ink up your swirl stamp with the Staz-On and stamp to suit.


Take the gears & cogs and ink them up with the metallic inks, applying generously.  


When dry, distress with pokey-tool, wire brush etc. taking care to distress the edges well,  then ink up over with a dark colour so the ink sinks into the scores.


If liked, apply brass collars or rivets with 'Cropadile' or similar to holes in centre.


Distress book-plate in same way.


Apply cogs & gears and bookplate in pleasing positions with silicone glue and finish off as desired.


This is your front cover plate for your technique book (...or greeting card if preferred!).


Now you could stop here and just add this to your folded card or made up book or you can continue to develop this as there are still plenty of things you can do to it!


To continue, take another piece of the grey-board and cover it with tinted newsprint.


You can use pages out of an old book from a thrift shop for this and you can either use one large page or you can use smaller pages and patchwork them.


Whichever you decide to do, you start the same by inking up your workmat with either your inkpads or drops of re-inker and then spritz. The lay your newsprint face down and 'zhuz' it round the workmat (...if it will go - be careful not to tear it if it sticks a bit...!) until you've sopped up all the ink.


You can speed up the drying with your heat gun, if you want but leave it a bit damp so it 'shrinks'  to fit the board.


Clean up your workmat, then lay your newsprint face down and use pva glue all over the back, starting in the centre and brushing it outwards. Foam brushes are good for this. Make sure the application is even or bubbles will occur.  


Lay your grayboard onto the glued side and fold the edges and ends over, removing any excess bulky paper. It'll tear really easily if it's old newsprint and if you get inconvenient tears, just stick another bit over the tear.


Turn the work over again and I used a brayer on this side to make sure there were no bubbles.


Turn it back and stick another piece of tinted print over the exposed greyboard.


At this point you'll need to decide where and how to attach your bindings/hinges.  I just punched holes and stuck eyelets in for the Tim Holtz 'D' rings to go through.  If you haven't got the right colour eyelets, use your Copics!


You then need to cover another greyboard, this time for your finished plate to be mounted on. You only need to do one side, if your paper is big enough to be folded back on the reverse side as your plate will cover the exposed bit of greyboard this time.  I added some Tim Holtz metal corners too.


The last thing is your fastener. I've used a bit of leather I've had for years and the hinge from Tim's 'Hardware Findings' die, by Sizzix.


The leather was the wrong colour being a rather garish shade of green, so I distressed it with my pokey tool and coloured it with Staz-On and my Copics. Still green but of a shade that is more acceptable! LOL!  You could probably use your greyboard again or some of Tim's Grungeboard if you can't steal your Dad's old leather belt....!


The light indoors is abysmal for photos so I'll try, before TTT goes live, to take a daylight photo of the finished binder.


I hope you all like this and I look forward to making sample 'pages of Tim's techniques to put into it, with their descriptions on the back, of course!


Hugs
Ei
x


Lots going on at Chez Eiglas... ;)

I've been home from work now for nearly three months - and it has been wonderful...! I've drawn, painted, had an amazing time with ...